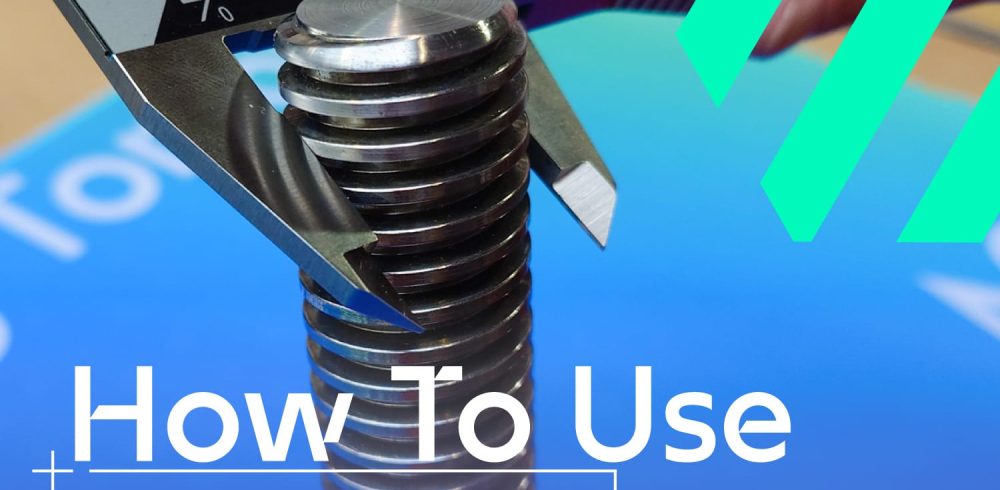
Patrick Faulkner, Lead Engineer at Accu, discusses vernier calipers and offers tips and advice on using them correctly
“Vernier calipers are amongst the most precise and versatile measurement tools in the field of engineering. Despite their accuracy, they are often misunderstood or underutilised due to their different scales, which can appear to make it complex to obtain measurements.
Understanding how to use these instruments effectively can significantly enhance an engineer’s measurement capabilities and accuracy when working on a project.
Understanding vernier calipers
Vernier calipers are made up of two main components: a fixed main scale and a sliding vernier scale. This dual-scale mechanism allows for more precise measurements beyond the limitations of standard rulers. The main scale provides the primary measurement, while the vernier scale enables readings in finer increments, typically ranging from 0.05mm to 0.02mm. This level of accuracy is crucial in fields such as mechanical engineering, manufacturing and scientific research.
To put this into perspective, a grain of rice is about 0.5 mm wide, and the human eye can detect differences down to approximately 0.1 mm. Vernier calipers measure beyond this threshold, providing precision that cannot be achieved with the naked eye.
Unlike digital calipers, which are also available and offer ease of reading, vernier calipers do not require a power source, which makes them essential tools in any engineering workshop.
Where are vernier calipers used?
Vernier calipers are popular across many different industries, due to their versatility and precision.
In mechanical engineering, these calipers are essential for ensuring that components meet strict dimensional tolerances and are used to measure the thickness of materials, the diameter of shafts and the depth of grooves. They are also used in many different manufacturing applications for quality control purposes, ensuring that products conform to specified dimensions.
Types of measurement
Vernier calipers are capable of performing four main types of measurements. Firstly, they can measure the outside diameter of an object. For this, an engineer would use the main jaws to measure the external dimensions of an object, such as the outer diameter of a precision screw.
They are also used to measure inside diameter. This involves selecting the smaller internal caliper jaws to measure the internal dimensions, such as the diameter of a hole.
Engineers can also measure the depth of holes or recesses, using the depth rod in the vernier caliper.

Finally, it is possible to carry out step measurement – which is the distance between two steps or surfaces on an object.
The best way to use vernier calipers
Here is some best practice advice to using vernier calipers effectively.
Firstly, ensure the calipers are clean as any debris or dirt can lead to inaccurate readings. After cleaning, make sure that the zero marks on the main scale and vernier scale align when the jaws are fully closed. This confirms that the caliper can zero correctly, making any measurements taken start from zero.
Next, position the object to be measured between the jaws of the caliper. Ensure that the object is positioned perpendicularly to the jaws for the most accurate measurement. Gently close the jaws until they make contact with the object without applying excessive force. At this stage, we advise using the locking thumb screw to secure the measurement in place. By doing this the caliper can be removed and laid flat on the workbench to get a better view of the scale. Take care to apply light pressure to the caliper when using the locking feature as the rotation of the threaded thumb screw inside could influence a small amount of misalignment. The applied pressure should be enough to negate any chance of this, however.

Finally, take a note of the last visible mark on the main scale that lines up with the vernier scale’s zero – this is the main scale reading. Look for the line on the vernier scale that vertically aligns perfectly with a line on the main scale – this is the vernier scale reading and gives you the fractional part of the measurement. Add the two values together to obtain the total measurement.
Top tip
To achieve the most accurate measurement of an object, ensure it is squared to the jaws, keeping the caliper perpendicular to prevent the chance of angular errors. Any misalignment can result in inaccurate readings, especially with cylindrical objects like screws and bolts where if measured in parallel, may mean not actually measuring the widest points. In most cases, maximising the surface contact between the caliper and the object will make it easier to remain squared and thus enhance measurement accuracy.
Hidden features
One of the hidden features of a vernier caliper, which most people are unaware of, is a measuring step. By extending the calipers just slightly and looking on the back of them, there is a step that appears. This step can be rested upon an item, aligning the bottom step and extending the top until it reaches the surface of the next step.
Also on the back of some makes of vernier caliper is what looks like a table or chart. This often provides the most common imperial and metric screw sizes, consisting of their outer diameters, thread pitch or threads per inch, minor diameter and drill bit sizing to tap a hole for them. Really useful information for any engineer!
Caliper test for accuracy
It is important to regularly test that a set of vernier calipers is measuring accurately. This can be done by performing caliper tests with precisely machined blocks, known as gauge blocks.
These blocks are made and calibrated to exact measurements and allow an engineer to perform a caliper accuracy test by measuring them to make sure the reading is actually the size of what the block is. For example, gauge block sets can be purchased that allow you to measure down to 0.0005mm accuracy, which is far more accurate than any caliper. For example, taking a 10.0000mm gauge block and measuring across it should give a caliper reading of 10.00mm. If the reading is more or less then the caliper is out of calibration.
In cases of loss of calibration, this is usually a result of wear and tear, such as damage to the jaws. It only takes a microscopic amount of wear or damage to give an inaccurate reading, sometimes that isn’t always visible.

Conclusion
So, whether an engineer is using calipers in a professional setting, or working on a personal project, mastering how to use vernier calipers effectively is an invaluable skill in the drive for the greatest accuracy.
By mastering the techniques for using them, users can ensure that their measurements are both accurate and reliable, contributing to the overall quality of an engineer’s projects.”
For more information about Accu visit www.accu.co.uk
Manufacturing & Engineering Magazine | The Home of Manufacturing Industry News


